 Add Row
  Add
Add 

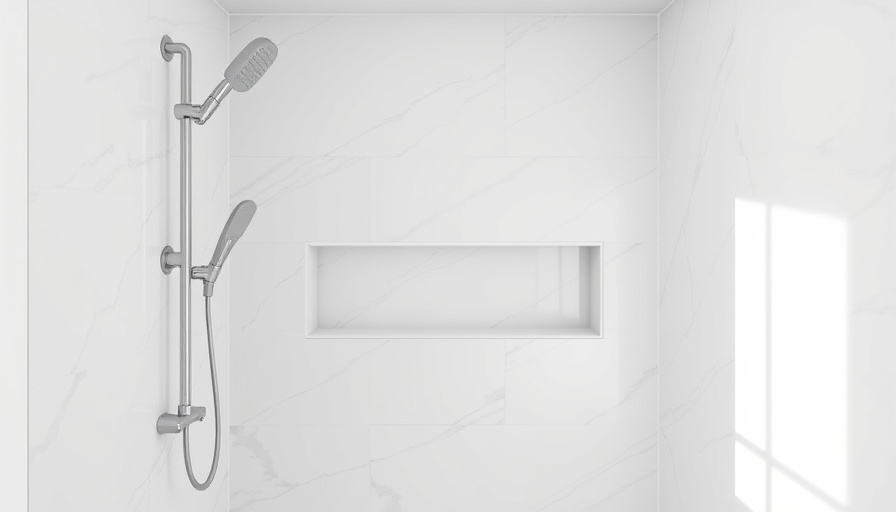
Transforming Your Bathroom: A DIY Guide to Tiling Shower Walls
Updating your bathroom can feel like a daunting task, especially when it comes to installing shower wall tiles. Yet, this enhancement can significantly elevate not just the aesthetics but the overall value of your home. Today, we’ll dive into how to tile a shower wall like a pro, using accessible materials and techniques that even beginners can follow.
Understanding the Value of Shower Tile Installation
Tiling your shower walls grants you immediate visual appeal while protecting surfaces against moisture. Choosing to tile can also prevent issues like mold and water damage, ensuring your investment stands the test of time. For those looking to add their touch to a bathroom remodel, wall tiles can provide a canvas of creativity without breaking the bank.
The Right Materials for Your Tiling Project
Before you get started, selecting the right materials is crucial. For our lake house renovation, we chose 12x24 porcelain tiles, which combine sleek design with durability. Here’s what you will need:
- Tile mortar/thinset (Flexbond is a great option)
- Grout (Polyblend in platinum offers a modern touch)
- Cement board and galvanized screws
- Tile leveling clips to ensure even placement
- Notched trowel, impact driver, and a tile cutter
These materials optimize your installation process, reducing the likelihood of mistakes along the way.
Step-by-Step Shower Tile Installation Process
Here is a streamlined approach to ensure a successful tiling experience:
- Preparation: Start by removing any old fixtures and ensure the walls are clean and dry. It’s helpful to remove old tiles, which might compromise the new installation.
- Measure and Plan: Take measurements of your shower wall to determine how many tiles will be needed. Lay them out dry to experiment with design before applying mortar.
- Application: Mix your mortar according to instructions and spread it on the wall. Use a notched trowel to create grooves for better adhesion.
- Setting the Tiles: Place your tiles on the wall, using spacers to maintain uniform gaps. Make sure to check with a level to keep everything straight!
- Grouting: Once the mortar has cured, remove spacers and apply grout with a float, pressing it into the spaces between the tiles.
- Finishing Touches: Seal around the edges and clean any dust or excess grout from the tile surface. Installing a glass door will now complete the modern look.
Tips and Tools for a Successful Outcome
When embarking on a DIY tiling project, having the right tools on hand can make all the difference. Tools like a tile cutter, a mixing paddle, and a quality tile level will significantly ease the workload. Remember to wear protective gear to avoid injuries.
In addition, effective planning by sketching out your design and writing a checklist before beginning your project can save you time and effort.
Common Misconceptions About Shower Tiling
Many homeowners hesitate to take on tiling projects due to misconceptions around the complexity and expense involved. However, with the right tutorial and supplies, tiling can be a fulfilling and relatively straightforward task. Research and preparation pave the way for a successful outcome!
Conclusion: Your Shower Tiling Adventure Awaits!
Tiling a shower wall not only bestows a fresh look but invigorates the entire bathroom experience. With high-quality materials and the confidence provided by a solid plan, your DIY project can achieve professional results. Every splash of tile is a step towards creating a personal sanctuary in your home. So roll up your sleeves and embark on this creative journey!


Write A Comment